• Skip to primary navigation
  • Skip to content
  • Skip to primary sidebar

Dunk & Crumble

  • Home
  • About Me
  • Recipes
  • Videos
  • Podcast
  • Contact

mollygilbert520

Roasted Shrimp and Veggies with Ina Garten’s Satay Dip

May 17, 2009 by mollygilbert520 3 Comments


Ina Garten‘s peanut sauce! Ina actually calls it satay dip, but it’s so stunningly delicious I wouldn’t care if she told me its name was Dick Cheney. Not that she would tell me that. She’s famous, so we don’t get the opportunity to chat much. Or ever. But she’s kind of my hero. I kind of think she can do no wrong. She lives in the Hamptons, for gosh sake. Year round! With her adorable husband and her all-white china and her sprawling herb garden.

Ina’s recipes are flawless – simple, elegant, consistently delicious. Her chicken piccata is light and fresh and makes you think that all chickens should be piccata’ed. Her lemon yogurt cake, her chicken with goat cheese and basil, her beef bourguignon, her coconut cupcakes, her kitchen clambake… they’re just all perfect. And her peanut sauce. For the love of god, the peanut sauce. …Satay dip. Whatever.

Former buxom blonde bombshell, Brigitte Bardot (how’s that for alliteration?) once said that “peanut butter is paté for children.” I think that’s sort of perfect. And, if true, it stands to reason that Ina Garten’s peanut sauce is paté for Mollys, and maybe even for you, too. I’m not saying you should attempt to bathe in it, but I think you should at least try it. Smeared on a chicken sandwich, saucing up shrimp or steak for lunch or dinner, or maybe served as a dipping sauce for chicken and shrimp skewers at your next party. And if you do want to bathe in it?  This is me not judging you.

Roasted Shrimp and Veggies with Ina Garten’s Satay Dip

I originally made this peanut sauce/satay dip for a girls night in featuring appetizers and a showing of the latest episode of Gossip Girl. I won’t go into the details of the lame, flashback-y show, but the peanut sauce is worth discussing. At length. It was meant to be served as a twist on the traditional cocktail sauce for shrimp cocktail, but we ended up dipping everything we could find in it – shrimp, raw veggies, pita chips, fingers.  In short, the peanut sauce was a major hit (albeit a slightly obscene one).

I’m not sure how, but I ended up with some leftover, which I immediately turned into one of the best dinners I’ve had in awhile: roast shrimp and veggies with peanut sauce.  Roasting gives shrimp such wonderful, juicy flavor, and it really couldn’t be easier.  And with the leftover peanut sauce?  Perfection.  Don’t be alarmed by the long list of ingredients in the satay dip – after a bit of chopping and measuring, the stuff comes together before you can say “thank you, Ina Garten.”

Ingredients:

For shrimp:

  • 1 pound peeled, deveined shrimp
  • 2 bell peppers, chopped
  • handful or two of snowpeas
  • 1 cup canned chickpeas, rinsed
  • 1-2 tablespoons olive oil
  • salt & pepper, to taste

For Satay Dip:

  • 1 tablespoon good olive oil
  • 1 tablespoon dark sesame oil
  • 2/3 cup small-diced red onion (1 small onion)
  • 1 1/2 teaspoons minced garlic (2 cloves)
  • 1 1/2 teaspoons minced fresh ginger root
  • 1/4 teaspoon crushed red pepper flakes
  • 2 tablespoons good red wine vinegar
  • 1/4 cup light brown sugar, packed
  • 2 tablespoons soy sauce
  • 1/2 cup smooth peanut butter
  • 1/4 cup ketchup
  • 2 tablespoons white wine or dry sherry
  • 1 1/2 teaspoons freshly squeezed lime juice

Directions:

Preheat oven to 400 degrees Farenheit. Arrange shrimp, veggies and chickpeas on a large sheetpan. Drizzle olive oil over shrimp and veggies, turning to coat, and sprinkle with salt and pepper. Place sheetpan in the oven and cook for about 10 minutes, until the shrimp are pink and juicy. Meanwhile, make the satay dip.

Cook the olive oil, sesame oil, red onion, garlic, ginger root, and red pepper flakes in a small, heavy-bottomed pot on medium heat until the onion is transparent, 10 to 15 minutes. Whisk in the vinegar, brown sugar, soy sauce, peanut butter, ketchup, sherry or wine, and lime juice; cook for 1 more minute. Spoon over the shrimp and veggies and mix to coat. If desired, cool and use as a dip for shrimp cocktail, grilled chicken or steak.

Makes 1 1/2 cups peanut sauce and enough roast shrimp and veggies for 2 people.

Filed Under: Appetizers, Dinner

Peanut Butter and White Chocolate Chip Cookies

May 10, 2009 by mollygilbert520 6 Comments

I think about cookies often. Mostly crisp-edged, buttery, chocolate-chippy cookies, but sometimes I think about soft, chewy, sugary cookies, too. Not much beats a warm cookie (or two) washed down with a glass of cold milk. Or even a room-temperature cookie eaten slowly over the kitchen sink while you think about what to make for dinner. (Ahem. Who made the rule that says that dessert goes after dinner, anyway?) I guess you could say I think cookies, chocolate-chipped and otherwise, are the bees knees. That’s why when my sister, Emily, told me she wanted to bake something involving peanut butter and white chocolate, I thought it best to try making peanut butter and white chocolate chip cookies. So, we gathered the ingredients and made peanut butter and white chocolate chip cookies, and it was definitively best.

I’ve been on a cookie bender ever since I heard about Drop In & Decorate, a cookie donation program in which I recently became involved. It’s simple, really – get some friends together, decorate cookies, and then donate them to a local shelter, soup kitchen, or other community agency serving people in need. I did some decorating with my new friend and fellow food blogger, Maris, who introduced me to Drop In & Decorate. Here are a few of our creations (note: what we lacked in artistic ability, we made up for in enthusiasm):

Not bad, huh? I mean, they’re probably not the prettiest cookies you’ve ever seen, but they taste delicious. (I know because I had to try one to make sure they were safe to bring to the Ronald McDonald house. They are.) Hopefully these cookies will brighten someone’s day.

Cookies for charity are wonderful, but so are cookies for me, so I’ll get back to the peanut butter white chocolate chips. I’ll just get straight to the recipe, because I know you have cookies on the brain. At least, I do.

PS: the nails in the pictures below belong to Emily. I’m not sure I could pull off blue nail polish, but, like everything else, it works on her. N’est pas?

Peanut Butter and White Chocolate Chip Cookies

To make these little pretties, Emily and I experimented with a simple chocolate chip cookie recipe, adding white chocolate and peanut butter chips instead of the regular chocolate. We thought about adding peanut butter swirls or a dash of cinnamon, but in the end decided that, when it comes to chippy cookies, simple is best. Just butter, flour, sugar, salt, baking soda and powder, eggs and vanilla. And chips, of course. In this case, peanut butter and white chocolate. These come out slightly crunchy, with a deep, buttery sweet, almost caramel-like flavor that makes you want to take a full stack of these guys and act slightly indecently. Don’t say I didn’t warn you.

Ingredients:

  • 2 1/4 cups all-purpose flour
  • 1 teaspoon baking powder
  • 1/2 teaspoon baking soda
  • 1/2 teaspoon salt
  • 1 cup (2 sticks) unsalted butter, room temperature
  • 3/4 cup vanilla sugar*
  • 3/4 cup dark brown sugar
  • 1/2 Tablespoon vanilla extract
  • 1 large egg
  • 2/3 cup peanut butter chips
  • 2/3 cup white chocolate chips

* We only used vanilla sugar because my mother got it as a gift and it was sitting in the pantry, waiting to be turned into a cookie. Feel free to use regular granulated sugar instead.

Directions:

Preheat the oven to 350 degrees. Line a few baking sheets with parchment paper.

Sift together the flour, baking powder, baking soda, and salt into a medium bowl and set aside.

Put the butter, granulated sugar, and light brown sugar in the bowl of an electric mixer and cream the ingredients on high speed. Don’t forget to scrape down the sides of the bowl with a rubber spatula to fully incorporate. Add the vanilla and egg and mix on medium speed. Add the flour mixture and mix on low speed just until batter is stiff and dough-like. Turn off the mixer and, using a large spoon or plastic spatula, fold in the chocolate and peanut butter chips.

Using a melon baller or small spoon, scoop heaping spoonfuls of the dough onto the baking sheet. Repeat with remaining dough, keeping about 2 inches between scoops. (You should get about 9 cookies on each sheet.) Bake until fragrant and golden brown, about 15-20 minutes.

Let the cookies cool before devouring them indecently.

Makes about 30 cookies.

Filed Under: Cookies & Bars

Chilean Sea Bass with Tomatoes & Spinach

May 5, 2009 by mollygilbert520 4 Comments

Well, it’s official. I live in New York City. I live in New York City! Gah. After a week of all that comes with moving – battling with bubble wrap, struggling to carry boxes down the stairs and load them into a moving truck, gripping the wheel of said moving truck as it clumsily hums down I-95, bruising body parts while unloading piles of junk from the truck and, finally, unpacking piles of junk into some semblance of a place where someone might live – I’m not sure I can still write in cohesive sentences. I guess we’ll find out.

So, New York. New York City. The Big Apple. The Center of the Universe. The City That Never Sleeps. And all that jazz. Actually, the New York City I’ve come to know these past few days involves a six block radius from Whole Foods to Bed, Bath & Beyond (or Bed and Bath, as my mother likes to call it. It doesn’t matter, because at this point, I’ve been there so many times that I could navigate the place blind. Need a curtain rod? Downstairs by the throw pillows. Bounce sheets? Don’t bother, they don’t sell them. Is my life in the big city thrilling you yet? I haven’t even gotten to the part where my dad and I put together an entire floor-to-ceiling shelving unit. …For the record, it was awesome.)

I know you probably want to hear more about the shelving, but I’d like to jump straight to the halibut. You know… just for the halibut. (Heyoo! …Sorry.) I had a wonderful group of girls over on Sunday night to help break in my new kitchen, and I’m happy to say that Jane Bursky’s halibut with tomatoes and spinach was my very first home-cooked meal in The Big Apple. At least, it would have been if the supermarket wasn’t out of halibut. We used Chilean sea bass instead, and we ate it while drinking wine from water glasses (apparently wine glasses were the one thing I forgot to buy at “Bed and Bath”), sitting in mismatched chairs around the tiny table in my brand new studio apartment, and I must say it was the best first New York meal I could hope for.


Chilean Sea Bass with Tomatoes and Spinach

Slightly adapted from the lovely Jane Bursky’s Halibut recipe

Though Chilean sea bass isn’t as conducive to clever puns as halibut (just for the… chilean sea bass?), it works beautifully in this dish, surrounded by a thick broth of onions, tomatoes, spinach and white wine. And friends like KGB, KGro, JBursk and Coface. If my first homemade meal is any indication, I think I’m going to like New York.

Ingredients:

  • 4 Chilean sea bass fillets
  • 2 Tablespoons olive oil
    5 cloves garlic, crushed
  • 2 bags baby spinach
  • 15 plum tomatoes (or tomatoes on the vine, whichever look best in the market), chopped*
    5 tablespoons capers
  • 1 cup white wine
  • 1 large onion, chopped
  • Salt
  • Pepper
  • Parmesan cheese, for sprinkling

*I know this sounds like a lot of tomatoes. It is. But trust me, in this dish, when it comes to tomatoes, the more the merrier.

Directions:

Heat the olive oil in large skillet over medium heat. Add onions and cook until lightly browned, then add the minced garlic and cook about 30 seconds more until garlic begins to turn golden.

Add all but a cup of the tomatoes, capers and white wine, simmering until the liquid is reduced almost in half. Add the rest of the tomatoes and the spinach in bunches, turning with tongs to incorporate into the sauce. If the sauce seems dry, add a bit more olive oil. Reduce heat (almost until the burner is off – you just want to keep the sauce hot).
Next, brush the fish on both sides with olive oil, and season with salt and pepper.
In another pan (I used a grill pan), saute the sea bass for about 4-5 minutes per side, or until the fish turns opaque.

Spoon sauce into the bottom of a bowl or deep plate, and top with the fish. Serve immediately, letting guests sprinkle parmesan on top to taste.

Serves 4, with extra sauce (which would also be fabulous on pasta or chicken).

Filed Under: Dinner

Bittersweet Brownies

April 22, 2009 by mollygilbert520 4 Comments


It’s true, you know. All good things must come to an end. I know because my Boston life, which is good, is coming to an end. If you’ve been reading this nook of the internets since the beginning, you may know that, this summer, I’m packing up all my worldly possessions (including my Kitchen Aid stand mixer, my autographed Chase Utley bobblehead doll and a healthy dose of nervous excitement) to start classes at The French Culinary Institute in New York City.

A week from Friday marks the big day (of moving, that is. Culinary classes don’t start until June. Let’s not rush things. I have a feeling it’s going to take me just as long to master the art of living in New York City as it will to master the art of french cooking. We’ll see.) At any rate, with just over a week left to call myself a Boston resident, I can’t help but feel a thick veil of finality settling in around me.

This past weekend I sang my last song and took my last bow and said my goodbyes to the wonderful cast of Gypsy. I’m glad to have my weekends back, but I already miss the cast comraderie and the nervous pride of putting on a show. Today is my last day of work, and while I’m thrilled to finally rid myself of cubicles and expense reports and overused consulting phrases (don’t even get me started on “low-hanging fruit”), I’m going to miss the office banter with Dan and long lunches (including LOST recaps and people watching) with Maral. Oh, and the steady paycheck. That I’m definitely going to miss. I’ve cleaned out my desk and bought boxes for packing and cancelled my gym membership, and as my daily routine crumbles, everything is really starting to feel over.

For now, I can only focus on the endings, but I know that soon I’ll be surrounded by beginnings, fresh and scary and fun. There will be a new apartment to paint and new friends to make, a new city to learn and new knives to sharpen, and for all of that I cannot wait. Still, goodbyes are always bittersweet, and I think this one, especially, calls for brownies.

Bittersweet Brownies

These brownies are sort of a signature of mine; I make them whenever I need an easy yet impressive dessert (or else just a straight shot of gooey chocolate), and though brownies may seem like a pedestrian, ho-hum sort of choice, these never fail to impress (or to trigger a magnificent chocolate-induced coma).

Laced with two forms of coffee and a dash of Bailey’s Irish Cream, these brownies are a grownup version of your favorite afterschool treat. They’re moist, dense and sinfully chocolatey, and if you decide to make them for someone (an office full of your colleagues on your last day of work, say), they won’t soon forget you.

Ingredients:

2 sticks plus 2 tablespoons unsalted butter
½ cup brewed coffee
12 ounces bittersweet chocolate
4 large eggs
1 cup white sugar
1/2 cup dark brown sugar
1.5 tablespoons ground coffee
1 cup all purpose flour
½ teaspoon salt
1 tablespoons vanilla extract
3 tablespoons Bailey’s Irish Cream Liquor
8 ounces milk chocolate chips

Directions:

Preheat oven to 350 degrees F. Butter a 9x13x2 inch metal baking dish and line the bottom with parchment paper. Butter the parchment, too.

Heat the butter in a medium pot over low heat until melted. Add the chocolate and stir until melted, removing from the heat. Stir in the brewed coffee.

In a small bowl, mix together the flour and salt.

In a medium bowl, mix the eggs and sugars with the ground coffee, vanilla and Bailey’s until combined. Once the butter/chocolate mixture has cooled a bit, add the egg/sugar mixture and stir to combine. Add the flour mixture, stirring until just blended. Lightly coat the chocolate chips with flour and fold into the batter. Pour batter into prepared pan.

Bake for 35-40 minutes, or until the top cracks slightly and a skewer inserted into the center comes out with moist pieces clinging to it. Do not overcook the brownies (remember that they will continue to cook slightly after being removed from the oven).

Allow brownies to cool completely before cutting into 2-inch square bars. Serve with a glass of milk or a dollop of whipped cream (or both. I don’t judge.)

Makes about 24 brownies.

Filed Under: Cookies & Bars

Spring Green Risotto

April 10, 2009 by mollygilbert520 3 Comments

It seems April is upon us. Boston has been enjoying some delightful rainstorms as of late – we’ve had a few gentle minuets of small watery droplets, some playful showers that seem to pit-pat the pavement with a rhythmic, do-wop beat, and some full-on orchestral thunderstorms. As for me, I’ve taken to curling up with a book by the window to listen to the watery symphony, or else I stomp around in my green rainboots and black umbrella with the duck handle when I’m forced to go outside for some silly reason or another, like to buy milk or pick up drycleaning or, you know, go to work.

The rain has brought with it not just the opportunity for tall rubber boots, but also the delicious smell of spring, of thawed fingers and sweet grass and rich, wet earth. I even saw pair of red breasted Robins and a bunch of pretty purple blossoms pushing through the stubborn ground on my way home today, so I’m declaring Spring officially here. (I know it’s technically been here for a few weeks now – at least, the calendar says it has been – but to me it’s not officially Spring until it smells like Spring. Which it now does. Happy Spring.)

All that splashing and puddle jumping can make a girl hungry, so I invited Megan and Maral over for dinner on Tuesday. I made Ina Garten’s Spring Green Risotto – a fresh, fragrant jumble of chewy rice, crispy asparagus, tangy spring onions, smooth mascarpone cheese and zesty lemon. We ate it sprinkled with chives and a touch of nutty parmesan and, paired with a crisp glass (or two) of Chardonnay and the best vanilla cupcakes in Boston (thanks, Maral), it made for the most wonderful dinner. It was warm and comforting (we ate it while watching Jeopardy and watching the rain bounce off the window sills), yet it tasted light and fresh, flecked beautifully with the green bounties of Spring. And the best part is you don’t even have to wait for a rainstorm to make it. Just make sure it smells like Spring.

Spring Green Risotto
Adapted from Ina Garten

I know some people get nervous about risotto because they think they’ll have to spend a lot of time standing over the stove, stirring away lest the rice burn, but fear not: this recipe is pretty much foolproof. You won’t burn the rice. There’s a bit of stirring involved, yes, but a little stirring never hurt anybody. Have a glass of wine handy and some good music playing. I prefer Nanci Griffith for this particular risotto (I think she goes nicely with rainy days), but you can choose whomever you like. In fact, you don’t even have to use spring onions and asparagus in your risotto – use whatever springy jewels catch your fancy. Try artichokes, or yellow beets, or sweet green peas, or all of them at once! It’s Spring, people! Catch the fever! And wear your rainboots.

Notes:
1. When I say I used spring onions for this dish, I don’t mean scallions. I mean super-scallions. You can find big spring onions in the produce section at most supermarkets and farmer’s markets once the winter weather starts to thaw. They look like scallions on steroids, with large, plump white bulbs and long green stalks. Choose onions that have stiff, vibrant green stems and are free of blemishes.

2. Arborio rice is a short-grained, Italian rice. They look like little rice nuggets, and give off the perfect amount of starch for the risotto. Look for it in the rice aisle at the supermarket.

3. Mascarpone cheese is basically the Italian version of cream cheese. Look for it in any market with a sizeable cheese section. I got mine at Whole Foods.

Ingredients:

  • 2 Tablespoons olive oil
  • 1 Tablespoon butter
  • 3 cups (about 3 large) spring onions, chopped (white and light green parts)
  • 1 cup chopped fennel (about half a large bulb)
  • 1.5 cups Arborio rice
  • 2/3 cup dry white wine
  • 4 to 6 cups chicken stock
  • 1 pound thin asparagus
  • 1/2 Tablespoon freshly grated lemon zest
  • salt and freshly ground pepper
  • 1.5 Tablespoons freshly squeezed lemon juice
  • 1/3 cup mascarpone cheese
  • 1/2 cup grated Parmesan cheese (plus extra for serving)
  • 3 tablespoons chopped fresh chives (plus extra for serving)

Directions:

Heat chicken stock in a small saucepan and bring to a simmer. In another medium pot, bring some water to boil (for blanching the asparagus).

Heat the olive oil and butter in a deep pot or dutch oven over medium heat. Add the spring onions and fennel and saute for 5 to 7 minutes, until soft and tender. Add the rice and stir for a minute or two to coat the grains with veggies, oil and butter. Add the white wine and simmer over low heat, stirring until most of the wine has been absorbed. Add the chicken stock, 2 ladles at a time, stirring intermittently and waiting for the stock to be absorbed before adding more. It will probably take about 25 to 30 minutes to add the chicken stock. Don’t feel obligated to add all of the stock – if the rice doesn’t seem to want to absorb any more liquid, stop adding stock.

Meanwhile, cut the asparagus in roughly 1.5 inch pieces (discarding the tough ends). Throw some salt into the pot of boiling water and drop in the asparagus, blanching them for about 4 to 5 minutes, until al dente. Drain the asparagus and cool immediately in ice water or under a cold running faucet.

When the risotto has been cooking for about 15 minutes, drain the asparagus and add it to the risotto with the lemon zest, 2 teaspoons salt, and 1 teaspoon pepper. Continue cooking and adding stock, stirring until the rice is tender but still firm.

Whisk the lemon juice and mascarpone together in a small bowl. When the risotto is done, turn off the heat and stir in the mascarpone mixture plus the Parmesan cheese and chives. Add more salt and pepper to taste, and serve hot with a sprinkle of chives and extra Parmesan cheese.

Serves about 4.

PS: Don’t forget dessert.

Filed Under: Dinner

Buttermilk Berry Scones

April 5, 2009 by mollygilbert520 2 Comments

I know what you’re thinking. Probably something along the lines of: gosh, I really hope Molly has barred Debbie Downer from writing any more posts about economic meltdowns and national crises… on her food blog. And yes, I admit my last post was a bit depressing, but I can assure you that I am in quite a better mood on this beautiful Sunday. I haven’t even heard from Debbie in days.

To prove it, I will speak nary a word about under-appreciated employees today. No, today I’d like to focus on something entirely different: under-appreciated baked goods. Specifically, scones. I don’t mean to imply that you don’t appreciate the gustatory treat that is a scone. I know you, dear reader, are much smarter than that. I just mean that, up until recently, I didn’t fully appreciate the scone as a legitimate member of the baked goods family. For shame.

But really, can you blame me? For years I grew up frequenting the local Starbucks thinking that a scone was nothing more than a stale, hulking brick of heavy dough laden with cinnamon and sugar and, mostly, an ungodly amount of calories. Whether the plan was to ingest them or use them as projectile weapons, those “scones” sitting in the glass counter looked dangerous. I kept my distance and pretty much wrote off the concept of scones entirely.

Until about two summers ago, when I found myself on a family trip to Ireland. Feeling adventurous, we signed up for a biking tour of Ireland’s west coast, and spent about a week biking through the hilly Irish countryside. Aside from perpetually sore backsides and the decision my sisters and I made to wear matching green raincoats (I still wear mine, obviously), the trip was amazing. We biked along winding roads flanked by charming, low rock walls, through colorful fishing towns and farmland full of cows and sheep, stopping here and there to take pictures or browse local shops for postcards or a bite to eat.

We also took a ferry over to the Aran Islands for a one night stay at a little Inn that was so positively charming that I cannot for the life of me remember its name. (Mom, if you’re reading this, help a kid out.) In any case, I do remember that the proprietor of this nameless Inn was a very sweet woman who made fantastic scones. When we arrived, exhausted from biking a few miles from the port to the Inn against a strong sea wind, she gave us a quick tour and told us that, if we woke up early enough the next morning, we could come watch her make the day’s scones in the kitchen. I promptly went to bed and forgot about the whole thing, still being in a generally anti-scone state of mind. But the next morning, as I sat down to breakfast and was passed a plate of freshly baked Irish scones, I couldn’t say no. These scones didn’t look a thing like the huge coffee shop bricks I was accustomed to. These were small and hot and golden, and smelled enticingly of fresh butter and flour. I slathered the flaky round with butter and honey, and when I finally took a bite, I was not disappointed. I mean, I was disappointed that I had missed out on 21 years of scone-eating, but this nameless Inn scone was the opposite of disappointing. It was warm and flaky and only slightly sweet and, combined with freshly brewed Irish breakfast tea, tasted how I imagine Sunday morning would taste.

I’m still kicking myself for missing the Aran Island scone-baking demonstration, but at least now I can appreciate the scone for all it’s worth. I recently found a recipe by M.S. Milliken and S. Feninger for buttermilk scones, and when last week’s lemon olive oil cake left me with half a carton of buttermilk sitting in the fridge, I knew exactly what to do.

Buttermilk Berry Scones
Adapted from a recipe by M.S. Milliken and S. Feninger

There’s not much that the creamy tang of buttermilk doesn’t enhance, and these little guys are no exception. The tang of the buttermilk combined with the sweetness of the berries gives these scones a wonderful balance. They’re not overly sweet or rich, but are light and doughy and loaded with pockets of jammy fruit, and would make a lovely breakfast smeared with butter and eaten with a mug of hot coffee or tea. Mine were devoured by a troup of hungry thespians during the final dress rehearsal for Gypsy, but you know… to each her own.

Feel free to omit the berries or play around with other versions (dried or candied fruit, nuts, or even chocolate chips, if you’re feeling a bit devious).

Ingredients:

  • 3 cups flour
  • 1/3 cup sugar
  • 1 teaspoon salt
  • 1.5 teaspoons baking powder
  • 1/2 teaspoon baking soda
  • 3/4 cup (1.5 sticks) unsalted butter, cubed
  • 1 cup buttermilk
  • 8-10 ounces frozen mixed berries (I like blueberries, raspberries, strawberries and blackberries)
  • 1 tablespoon milk or heavy cream, for brushing
  • extra sugar, for dusting

Directions:

Preheat oven to 40o degrees F. Combine the flour, sugar, salt, baking powder and baking soda in a large bowl. Cut in the butter with your fingertips or two knives until the mixture becomes a coarse meal. Add the buttermilk and mix with your hands until just combined. Add the berries (still frozen), pressing lightly to incorporate into the batter.

Dump the dough onto a floured board and roll out until about 3/4 inch thick. This will be a very messy job – just make sure you keep flouring your rolling pin so the dough doesnt stick (and try not to be dismayed by the berries that will inevitably free themselves from the sticky dough and roll onto the floor). Using a round cookie cutter or the mouth of a small glass, cut out rounds of dough and place slightly separated onto a greased baking sheet. Brush the tops with milk or cream, sprinkle with a bit of sugar, and bake for 15 minutes, or until lightly browned. Serve warm, plain or topped with butter and jam.

Makes 16-18 buttermilk berry scones.

Filed Under: Breakfast

Hard to Swallow

April 2, 2009 by mollygilbert520 Leave a Comment

Whew. It’s been quite a week, dear reader(s)… and apparently it’s only Wednesday. Actually, some not great things have happened this week. Firstly, I managed to get so many paper cuts at work today you’d think I tried to craft a small origami village, when really all I was doing was a mail merge. Then there was yesterday, when I seem to have (gracefully) tripped down a flight of stairs and landed squarely on my right ankle. (Turns out my ankle is fine, though the jury is still out on my self-esteem and personal dignity.) And, worst of all, there’s the fact that five of my colleagues, two of whom I consider my friends, were laid off yesterday. Which just really stinks.

A sign of the times, I suppose, though it doesn’t make their departure any easier to swallow. It makes me feel guilty, and also a little bit ashamed. I mean, up until yesterday, all the recession meant to me was that everything was on sale. And that the term “recessionista” had been invented. The various national and international crises hadn’t yet reached my doorstep, and I sort of just assumed everything would be fine. It’s nice living in a bubble… until it bursts. At any rate, I hope that M & P land on their respective feet. I’m going to miss them.

But, the show must go on. Literally. I’m performing in a play that opens this weekend, and our crazy rehearsal schedule hasn’t given me much time to dwell on layoffs and bubbles and stock market crashes. Or food, for that matter. Mostly, my non-working hours for the past two weeks have been filled with high-pitched singing, flouncy Spanish senorita skirts, set change assignments and fake eyelashes. I’ve barely cooked all week, and I was in such a rush to get to rehearsal last night that I actually skipped dinner. (…I know! Blasphemy. That must be why I fell down the stairs.) Tonight was my one night off from rehearsal, but after catching up on all the grocery shopping, laundry and apartment cleaning to do, I was too tired to even turn on the oven. Instead, I opted for some crusty bread, a few smeared slices of sharp cheese, some plump medjool dates and a crispy apple. YUM. Added bonus: I saved money by not turning on the gas stove. I mean, we are in a recession afterall.

I hope you’ll forgive me for not posting a recipe this week – it’s been a crazy one. I did manage to bake this cake last weekend. The recipe is for a blood orange olive oil cake, but I used meyer lemons instead, and I think it worked beautifully. I expect it would work with any type of citrus, really, and be delicious. Be warned, though: if you’re the type to stick by the conventional notion that cake should taste purely sweet, you may not like this one. It’s sweet enough, but you can really taste the olive oil – it gives the cake a subtle earthy, fruity flavor and a sturdy, moist crumb. Be sure to use good olive oil – if you’re not sure what “good olive oil” really means, just give the oil a taste to make sure you like the flavor before you use it to make citrus olive oil cake.

That’s all for now. Here’s to a better week ahead (with some recipes, for goodness’ sake!) Until then, keep on plugging away, and try not to forget to eat dinner.

Filed Under: None

Apricot Sunny Side Up Cookies

March 23, 2009 by mollygilbert520 4 Comments

So apparently I’m not that great at remembering certain holidays. First Pi Day, now Purim. There was also that time that I forgot my little sister Emily’s 9th birthday while we were both at summer camp, but I’m pretty sure she’s gotten over that. And technically Purim was before Pi Day, but that is irrelevant because, if you haven’t figured it out yet, there’s something you should probably know about me: I’m not that great at being Jewish.

To be fair, I’m probably not much worse at Judaism than a normal Reform Jew. …Fine, maybe a little worse. Organized religion is just not a major force in my life. I do, however, very much like being Jewish. I may not be a particularly religious person, but culturally, I’m very happy to be part of the tribe. Jews have a rich cultural and culinary history, and I love being part of it all… especially the culinary part. Between brisket, matzoh ball soup, chopped chicken liver, blintzes, knishes, latkes, kugel, challah, schmaltz, falafel and, of course, bagels, Jews have cornered the market on delicious. Which brings me to those sweet little triangular symbols of Purim: hamantashen.

The story of Purim centers around a King named Ahasuerus, his Queen, Esther, her good uncle, Mordecai, and a bad man named Haman. Essentially, the evil Haman hatches a plot to wipe out all of the Jews in the ancient Persian empire, but good Mordecai learns of the awful plan and teams up with Queen Esther (herself secretly a Jew) to foil Haman’s plans. …That’s the abridged version, anyway. At any rate, all’s well that ends well, and today, the festival of Purim celebrates the liberation of the Jewish people from Haman’s wicked plot to destroy them. Which brings me back to the hamantashen.

Hamantashen (sometimes spelled hamantaschen, or homentashen, or homentaschen… you get the idea) are small triangular cookies, traditionally filled with poppy seed or prune jam, though I’ve enjoyed them with many different fillings, including cherry and, my favorite, apricot. The cookies are shaped like triangles to reference Haman’s three-cornered hat which, though you may not be aware, is famous. It even has a commemorative song that my kindergarten class once took much pride in mastering:

My hat it has three corners,

Three corners has my hat.

And if it not three cornered,

It would not be my hat.

Very simple and to-the-point, but really quite charming. Much like a little plate of hamantashen, actually.

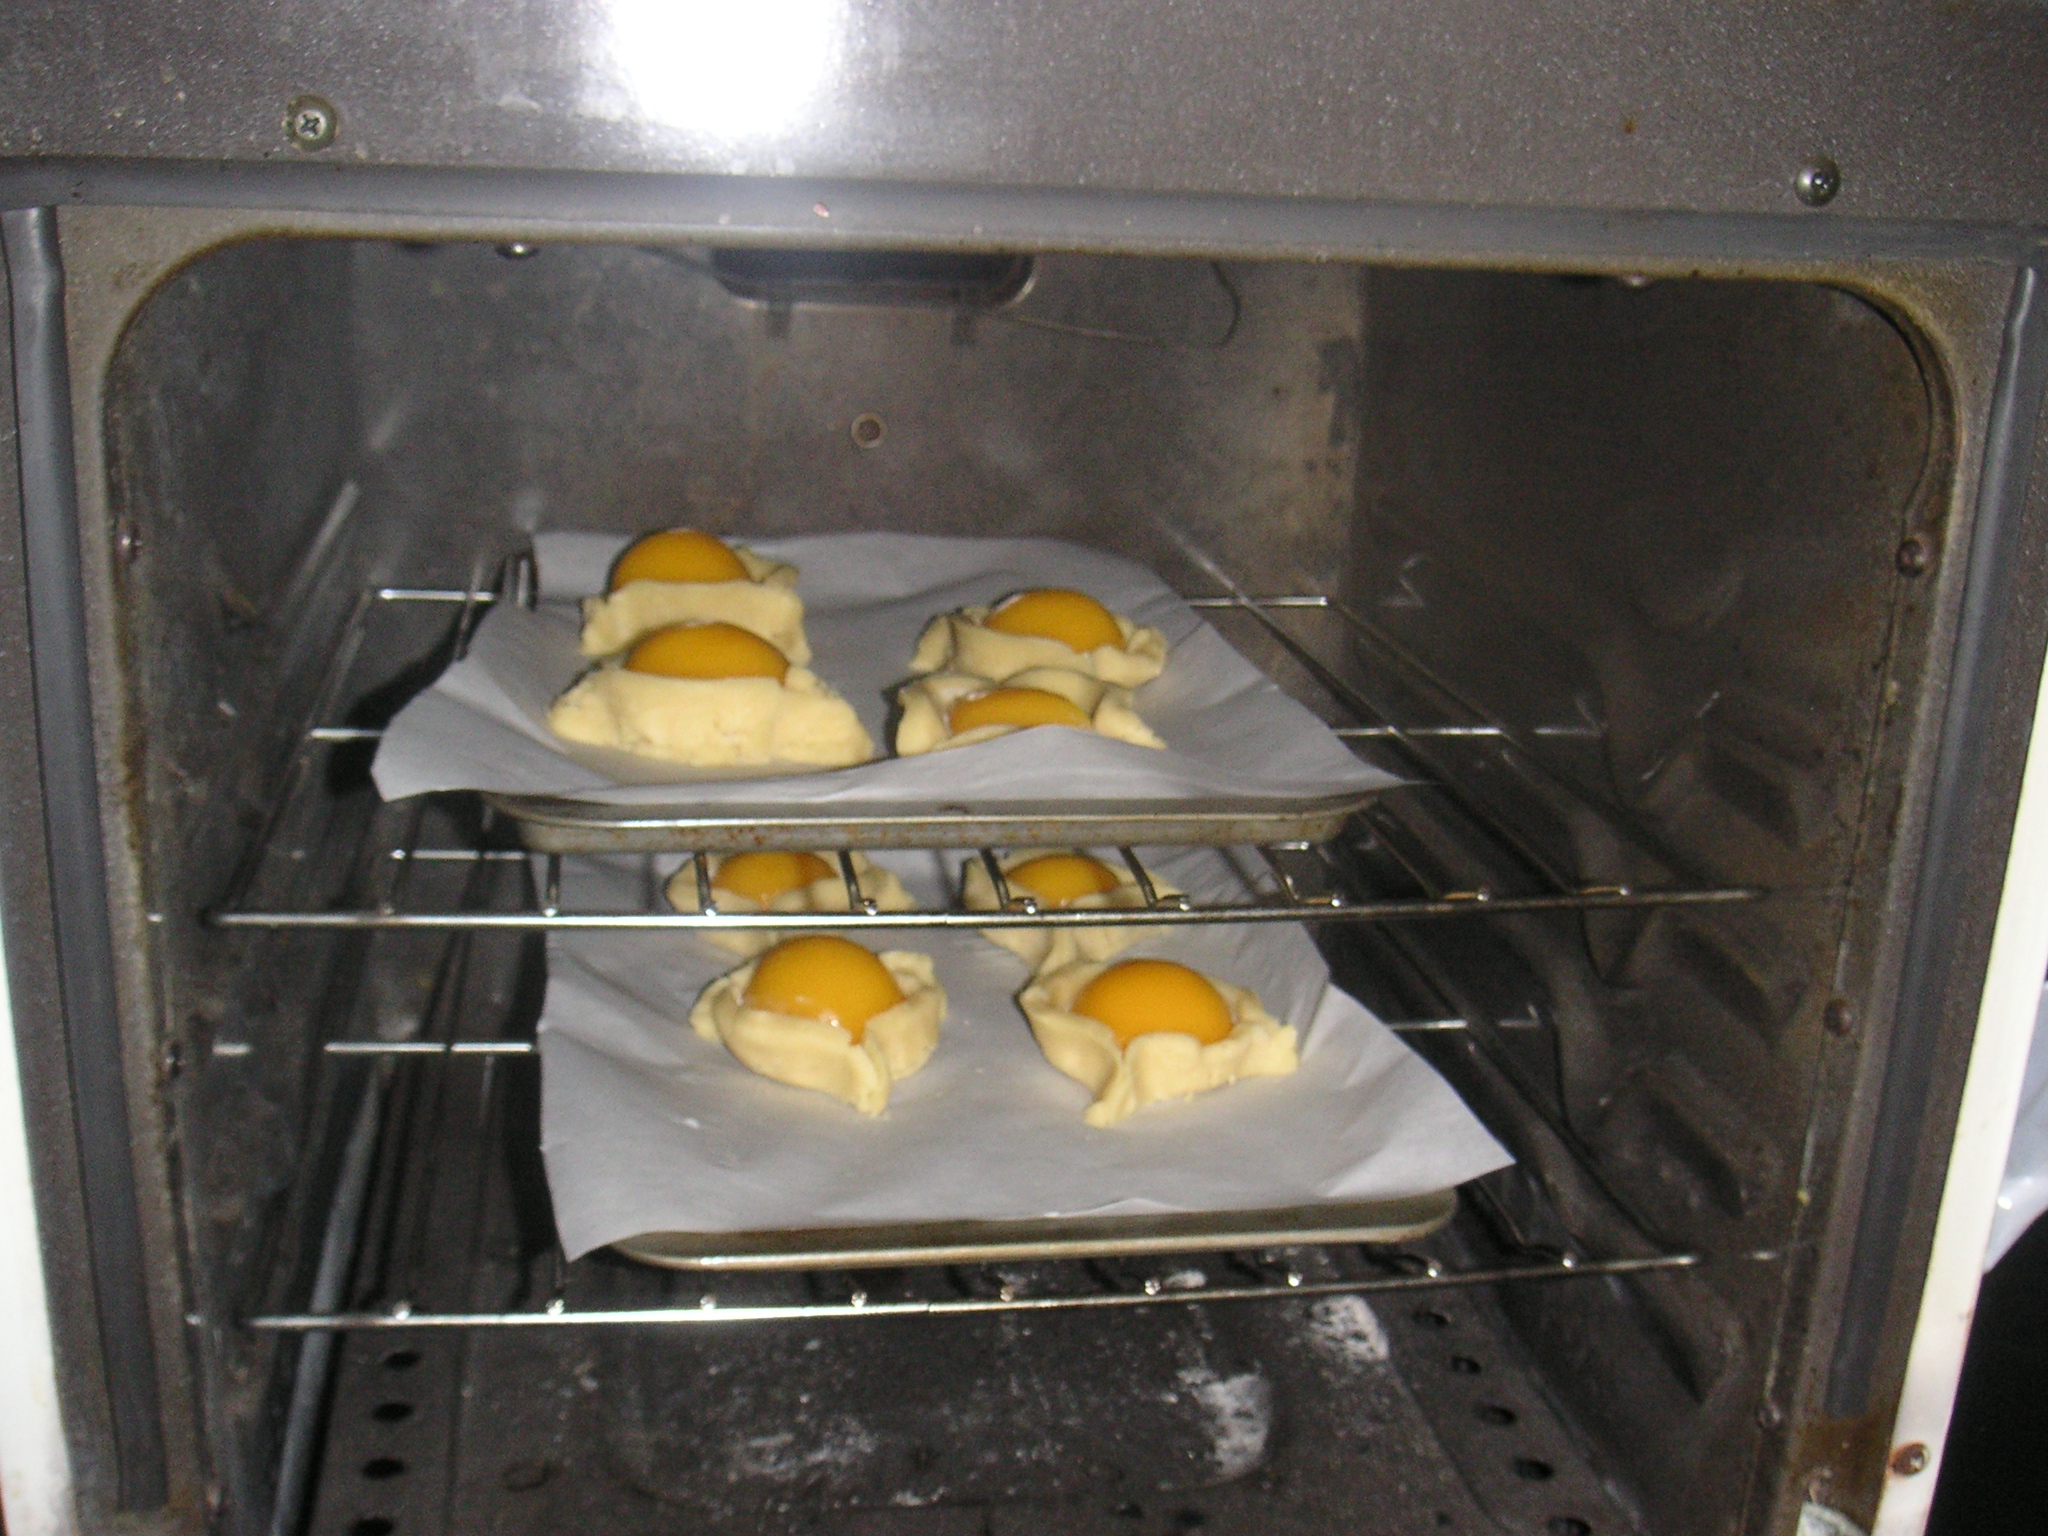
I really should have known better than to mess with years of Jewish culinary tradition, but mess I did. I tried to make my own version of hamantashen, using whole apricot halves instead of apricot jam, and using a shortbread cookie as the base instead of the traditional butter-less (!) cookie dough. Needless to say, it didn’t really work out as planned.

I mixed and chilled the shortbread dough, cut it into thin cookie rounds, topped each circle of dough with a dollop of sweetened creme fraiche and half of a sweet peach (I couldn’t find any apricots at the store, fresh or jarred), and then pinched the doughy corners of the circular cookie to form a nice, hat-shaped triangle around the peach half. Success!

…Nope. I don’t know if the peach halves were too big, or if the shortbread is just too heavy a dough to be molded like that, but my “hamantashen” just didn’t want to be shaped like triangles. “To heck with Haman’s hat,” they screamed when I pulled them out of the oven, looking delicious but defiantly round and un-hamantashen-y. “Fine!” I yelled back, biting into a warm, golden cookie and sopping up the peach juice running down my chin. I mean really, what did you expect? I told you… I’m not a very good Jew.

“Hamantashen” Cookies with Whole Fruit Halves

Instead of looking like three-cornered hats, these cookies come out of the oven looking exactly like little sunny-side up eggs, which is actually how the recipe that inspired me means for them to come out. You know what they say: if it ain’t broke, don’t let Molly futz with it. Next time I’ll just skip the triangles and call these “sunny-side up cookies,” or else I’ll re-try the hamantashen with regular pie dough (instead of shortbread) and smaller fruit halves. You could use any stone fruit for these cookies – I bet they would be delicious with poached fresh plums. You could also substitute prepared vanilla pudding or pastry cream for the creme fraiche mixture. Either way, let me know how they turn out, three-cornered or otherwise.

Ingredients:

For the dough:

  • 3 sticks unsalted butter, at room temperature
  • 1 cup sugar
  • 1 teaspoon pure vanilla extract
  • 3.5 cups all-purpose flour
  • 1/4 teaspoon salt

For the filling:

  • 12-14 apricot halves (either from a jar or can or poached fresh apricots)
  • 1/2 cup creme fraiche
  • 1 teaspoon pure vanilla extract
  • 1/2 to 1 Tablespoon sugar
  • A few Tablespoons of apricot jam

Directions:

First, make the shortbread dough. Sift the flour and salt together in a medium bowl. In the bowl of an electric mixer (if using), mix together the butter and sugar until just combined. Add the vanilla, and then the flour/salt mixture. Mix on low speed until the dough starts to come together. Dump the dough onto a floured board and shape into a disk. Wrap the disk in plastic wrap and refrigerate for 30 minutes.

Preheat the oven to 350 degrees F. Line 2 small or 1 large cookie sheet with parchment paper.

On a lightly floured board, roll out the shortbread until it’s about 1/4-inch thick, and cut large rounds from the dough using a cookie cutter or the top of a large cup or glass. Place dough rounds onto the cookie sheet(s).

In a small bowl, whisk together the creme fraiche, vanilla, and sugar. Using a small spoon, dollop a spoonful of creme fraiche into the center of each round cookie. Place an apricot half on top of each dollop of creme fraiche. The cookies will now look like little sunny-side up eggs.

Bake in the oven for 20-25 minutes, until the shortbread is lightly browned and the kitchen smells absolutely divine.

Brush the fruit halves with apricot jam for an extra boost of flavor and to help them stay fresh and shiny.

Makes roughly 12-14 sunny-side up cookies, or “hamentashen for mediocre Jews.”

Filed Under: Cookies & Bars

Alsatian Tart

March 20, 2009 by mollygilbert520 5 Comments

So, let’s talk about the elephant in the room. I know you’re all wondering why I failed to write a post to commemorate the very important holiday that took place last Saturday, and I’d just like to take this opportunity to apologize for skipping over such an important day in the calendar year. I’m sorry. Never again will I neglect to document the delicious events of Pi Day.

Pi Day! You know, March 14th! March 14th… 3/14. As in, the appropriate number day to celebrate that mathmatical phenomenon we call Pi: 3.1415blahblahnumbersnumbersuntilinfinity. Pi! It’s a number that goes on forever. Forever! It’s going on right now, actually. This very second. …Whoa.

My appreciation for Pi Day began in the sixth grade. My teachers held a contest on March 14th to see which student could memorize the most digits in Pi. A kid named Matthew won, after memorizing upwards of some 80-odd digits. I guess that’s pretty good, except when you think about the fact that it’s only 80 out of infinity. Not great percentage-wise. Of course, I didn’t get much past 3.1415, but that’s because I was distracted by pie. The dessert, not the number. I mean really, is there much of a contest? There were tables lined with pie to help celebrate Pi Day; there was blueberry, apple, peach, strawberry rhubarb… who cares about numbers when you’re staring at a table full of strawberry rhubarb pie?

There was no strawberry rhubarb this year, but there was a delicious Alsatian pizza pie. I suppose pizza is a different approach to Pi Day, but I think it works just as well. This way you don’t have to wait for dessert to start celebrating. Now then, the Alsatian pizza. Charlie and I ordered one on Saturday night at Picco, one of my favorite restaurants in Boston. It came out of the kitchen piled with gruyere, lardons (a fancy way of saying bacon) and creme fraiche, and it was speckled with woodsy rosemary spears and flecks of lemony thyme. Simply put, it was superb, and it inspired me to make an adapted version for last night’s dinner – a savory Alsatian tart.

Now I know that a tart is not a pie, pizza or otherwise, but I think of tarts and pies as being related. Sort of like cousins, where pie is the hearty, Midwestern, sweet yet rough-around-the-edges gal, and the tart is her sleek, elegant, slightly snooty cousin from France. I often want to hang out with pie and bask in her wholesome simplicity, but occasionally I’m in the mood to spend time with someone a bit more sophisticated. Or at least someone who incorporates more bacon.


Enter, Alsatian tart. With tangy cheese, melty, caramelized onions, and crispy bacon, this (not at all snooty) tart gives strawberry rhubarb pie a run for its money. Happy belated Pi Day!

Alsatian Tart with Caramelized Onions, Bacon, and Creme Fraiche

A word to the wise: you will want to eat more than one piece of this tart. Don’t. I mean, you could if you really wanted to, but you may regret it. Between the butteriness of the crust, the saltiness of the bacon, the sweetness of the onions, and the creaminess of both the gruyere and creme fraiche, this is one rich tart. I had two pieces for dinner last night, and my tummy was scolding me all the way to bed. I suggest pairing one slice of Alsatian tart with a crisp salad of baby greens or roasted asparagus for a delicious and well-balanced lunch or dinner. Your tummy will thank you later.

Note: You could easily make this vegetarian friendly by omitting the bacon (though you may want to add more salt to compensate for the lack of salty meat). If you don’t have a tart pan, you could use a regular pie dish instead.

Ingredients:

For the crust:

  • 2 cups all-purpose flour
  • 1/2 teaspoon salt
  • 12 Tablespoons (1.5 sticks) cold unsalted butter, cubed
  • 1/2 cup ice water

For the filling:

  • 6 strips bacon, chopped
  • 3 medium yellow onions, thinly sliced
  • 1 large egg
  • 1/2 cup milk
  • 1 cup grated Gruyere cheese
  • Salt
  • Freshly ground pepper
  • 1 Tablespoon fresh rosemary, roughly chopped
  • 1/2 Tablespoon fresh thyme, roughly chopped
  • A few spoonfuls of creme fraiche

Directions:

First, make the crust. Place the flour, salt, and sugar in the bowl of a food processor, and pulse for a few seconds to combine. Add the butter and pulse about 10 times, until the butter is in small bits the size of peas. With the motor running, pour the ice water down the feed tube and pulse just until the dough starts to come together. Dump the dough onto a floured board and knead quickly into a ball. Wrap in plastic and refrigerate for at least 1 hour.

Preheat the oven to 375 degrees.

Roll out the dough on a floured board and press into the bottom and sides of a 9-inch tart pan. Cover with plastic wrap and place in the refrigerator to chill while you make the filling.

To make the filling, first crisp up the bacon over medium high heat in a large saute pan. When the bacon bits are sufficiently crispy, remove them from the pan with a slotted spoon and drain them of grease on a plate covered with a paper towel. Cook the sliced onions in the remaining bacon grease over medium heat, stirring often, until the onions are very soft and lightly browned, just beginning to caramelize.

In a medium bowl, whisk together the egg and milk. Add the Gruyere, rosemary, thyme, and salt and pepper to taste. Stir in the browned onions and bacon bits with a fork, until well incorporated. Pour the egg mixture into the tart shell, and dollop spoonfuls of creme fraiche on top.

Bake for 25-30 minutes, until the filling is set and the tart is beginning to brown.

Makes one 9-inch tart.

Filed Under: Dinner

Uncle Charlie’s Garlicky Fennel Seed Pasta with Kalamata Olives

March 16, 2009 by mollygilbert520 2 Comments

Can I tell you what I find troubling about cooking with garlic? Yes? Okay here goes:

Nothing. Nothing at all, actually. In fact, I quite enjoy cooking with garlic. Crackling the plump cloves from their papery package, smashing the fat little boats under the side of a knife to remove their stubborn skin, inhaling that rich, spicy smell that intensifies under a flame, the heat bringing out the tender sweetness of the sharp and tangy bulb…

Oh, sorry. What were you going to say? Garlic breath? No big deal. Don’t kiss me. Or, if smooch you must, just have some yourself. Maybe you were going to bring up the way it’s almost impossible to get the garlicky smell out of your hands? Yeah, I’m not really bothered. I try not to go around smelling my hands that often. I figure garlic hands are a small price to pay for something like, oh I don’t know… Uncle Charlie’s Garlicky Fennel Seed Pasta with Kalamata Olives. For example.

Speaking of Uncle Charlie’s Garlicky Fennel Seed Pasta with Kalamata Olives, I happened to have some for dinner last night. I know! Small world.

There are many things I enjoy about Uncle Charlie, including his affinity for historical sites, good wine, maps, baseball, crossword puzzles, European countries and public transportation, and his aversion to “loud” music and most forms of modern day technology, including automobiles and that crazy newfangled device called the cell phone. I also enjoy when he drops by to visit for the weekend from Chicago, or wherever else his job in the airline industry has taken him – Paris, Hamburg, San Francisco, Berlin. He usually brings me things. Things like wine books, knit hats bearing logos of European soccer teams, old maps, macaron cookies from La Duree in Paris. One time he brought me a ginormous beer mug from Oktoberfest in Berlin. It’s huge and ceramic and has a picture of a pretty blond woman in lederhosen painted on the side. I use it as a vase to hold fresh tulips.

Anyway, this weekend happened to be one when Uncle Charlie came to visit. Besides spending time at the bookstore and drinking thick hot chocolate from a place called Burdick in Harvard Square,

Charlie and I made garlicky fennel seed pasta with kalamata olives. It’s his specialty. I’m going to tell you about it because it’s phenomenal, and I fully expect you to want to vigorously shake my hand as a thank you for sharing the recipe. But, please don’t. I’m still a bit under the weather, and hand-shaking encourages germ sharing. Plus my hands smell like garlic.


Uncle Charlie’s Garlicky Fennel Seed Pasta with Kalamata Olives

Charlie first made this dish for me roughly ten years ago, when I was in high school, visiting him in his studio apartment in Chicago for a few days over the summer. To be honest, I didn’t really appreciate it back then – that was before I wised up and started liking olives. I don’t know what I was thinking, really, because Uncle Charlie’s Garlicky Fennel Seed Pasta with Kalamata Olives is delicious. It’s an explosion of spicy and sweet and salty, which is amazing considering how few ingredients are involved. It’s simultaneously chewy and crunchy, and I just love how the pasta is polka dotted with shiny, round, deep purple olives. However, be warned: this dish is possibly addicting. Uncle Charlie claims to have once gotten addicted to it a few years ago, eating it at least three nights a week for weeks on end. Which really would be fine by me.

As I mentioned, there are very few ingredients involved in this dish, so make sure you buy the best quality olives and cheese you can find. You can find fennel seed in the spice section of most supermarkets. If you’re vehemently anti-pits, you could use pitted kalamata olives instead of regular whole ones, but I sometimes find the pitted versions a bit mushy and overly salty with brine.


Ingredients:

Olive oil
6-7 large cloves of garlic, chopped into thin round slivers
1.5 Tbsp fennel seeds, roughly crushed (with a mortar & pestle or in a food processor)
1 tsp crushed red pepper flakes (or more, if you want to go for extra spicy)
1-2 cups fresh kalamata olives, rinsed of excess brine
1 pound dry penne pasta
juice from 1/2 lemon
A good hunk of parmigiano-reggiano cheese

Directions:

Add the penne to a pot of salted boiling water, and let cook for 10 minutes.

Meanwhile, slice up your garlic and crush your fennel seed. When the pasta is almost done cooking, coat the bottom of a large, deep skillet or dutch oven with olive oil, and place over medium high heat. When the oil is hot, add the garlic slices and fry gently until the slices start to turn light brown, about a minute or two. If the garlic is browning too quickly, lower the heat accordingly – do not burn the garlic. Add the red pepper flakes and crushed fennel seeds and let cook, stirring, for about a minute. Stir in the olives and splash of lemon juice.

Drain the pasta and add it to the garlic skillet. Stir the mixture so the pasta becomes coated in olive oil, pepper, garlic and fennel seeds. If the mixture seems dry, add a splash more olive oil.

Serve with heaps of parmigiano-reggiano cheese and a glass of fruity wine. (And don’t forget an empty bowl for the olive pits).

Serves about 4.

Filed Under: Dinner

  • « Previous Page
  • Page 1
  • …
  • Page 44
  • Page 45
  • Page 46
  • Page 47
  • Next Page »

Primary Sidebar

H!. I’m Molly. I’ve got big cheeks and big dreams. Looking for healthy and also unhealthy recipes, with a side of random chatter? You’ve come to the right place.

Stay In Touch

  • Facebook
  • Instagram
  • Pinterest
  • Twitter

Books

Sheet Pan Sweets gives us all the sweets on just one sheet! From sheet cakes, rolled and layered cakes, cookies, bars, pies, tarts, even breakfast treats – sheet pan baking means plenty of sweets to share, and I’ve got you covered with this one.


One Pan & Done is about getting simple, delicious meals from your oven to your table, post haste. Pull out your sheet pans, Dutch ovens, cast iron skillets, casserole dishes, muffin tins and more – we’re coming for ya!


Sheet Pan Suppers is my first book! It is about cooking on a sheet pan (read: easy set-up, easy clean-up!) and I think you might be into it.

Copyright © 2026 Dunk & Crumble on the Foodie Pro Theme

Loading Comments...